Are you ready to create sterling silver jewelry that showcases your style? You do not need to be an expert to start making silver jewelry you will love. Each piece can reflect who you are and the beauty of natural stones. Every gemstone is unique, so your jewelry projects will be distinct. You will learn how a few easy steps can turn ideas into beautiful projects, just like the ones in Perfect Jew’s collection.
Collect important materials like 925 sterling silver and real stones before you begin your jewelry project. Make a safe and tidy workspace with bright lights and fresh air to help you work better. Draw your designs and pick stones that match your style and how much you want to spend for special pieces. Learn simple skills like bezel setting and wire wrapping to keep your gemstones in place and make pretty jewelry. Clean your finished jewelry often to keep it shiny and stop it from getting dull.
You need to get the right materials before you start. Good silver and real stones make your jewelry last longer and look nice. Perfect Jew picks materials that are safe for the planet, so you can feel proud of your work.
Here is a simple table to help you choose the best silver wire:
Gauge | Primary Use | Common Applications |
|---|---|---|
24–28 | Fine detail work | Weaving, coiling, intricate wrapping, small beads |
22 | Versatile sculpting wire | Wire-wrapped pendants, rings, small clasps |
20 | Jewelry findings | Headpins, ear wires, light frames |
18 | Structural elements | Heavier ear wires, bracelet and necklace frameworks |
16 | Bold statement construction | Ring bands, choker bases, bangle cores |
14+ | Heavy-duty construction | Substantial ring bands, men’s jewelry |
You also need these things:
925 sterling silver sheet or wire
Natural stones like agate, amethyst, pearl, or amazonite
Jewelry findings such as clasps, jump rings, and ear wires
You need some basic tools to make sterling silver jewelry. These tools help you cut, shape, and finish your silver and stones.
Saw and saw blades
Metal file
Mandrel for shaping rings
Soldering torch and solder
Pickle pot for cleaning silver after soldering
Polishing wheels
Pencils and paper for drawing designs
Soldering board and soldering pick
Clean water, copper tongs, and a clean rag
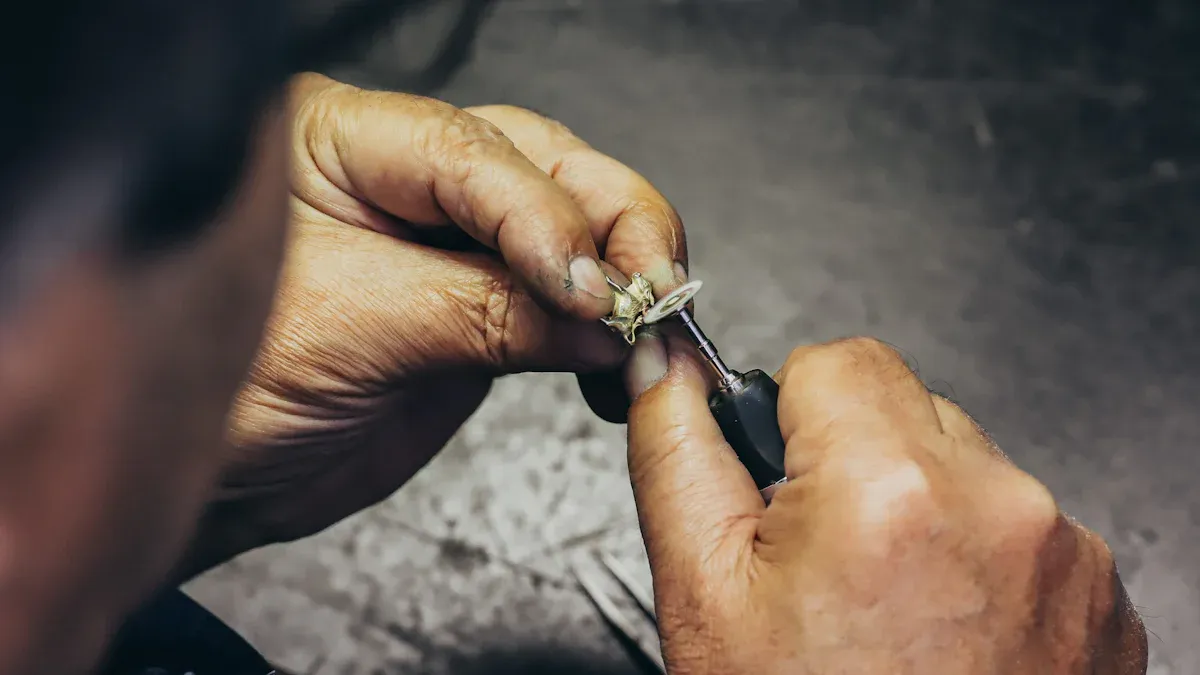
You will use these tools for many steps. You will cut silver, set stones, and polish your jewelry. Bezel setting is a good way to hold stones. It is easy for beginners and keeps the stone safe.
Tip: Keep your tools neat and in order. This helps you work faster and keeps you safe.
A clean and safe space makes jewelry making more fun. Use a strong table with places to store your tools. Bright lights help you see small details and protect your eyes. If you use a soldering torch, work on a surface that does not burn. Make sure your room has fresh air. A dust collector helps keep the air clean when you file or polish silver.
Pick S925 silver for your jewelry. It is strong and works well for small designs. Clean your jewelry often to keep it shiny and pretty.
You want your jewelry to stand out. Start with a mood board. Gather pictures of your favorite crystal shapes, colors, and styles. This helps you see what inspires you. Next, grab a pencil and sketch rough drafts of your ideas. Focus on the shape and size of each piece. Try different arrangements. Change the way the crystal sits or how the silver wraps around it. Ask friends or family what they think. Their feedback can help you improve your design. Make changes until you feel happy with your plan.
If you like technology, try using CAD software. This tool lets you create detailed designs on your computer. You can see your jewelry in 3D before you make it. CAD helps you check the size and fit of each crystal. It also lets you change your design easily. Many jewelers use CAD to make sure their pieces look perfect.
Tip: Don’t rush your sketches. The more you plan, the better your jewelry will look.
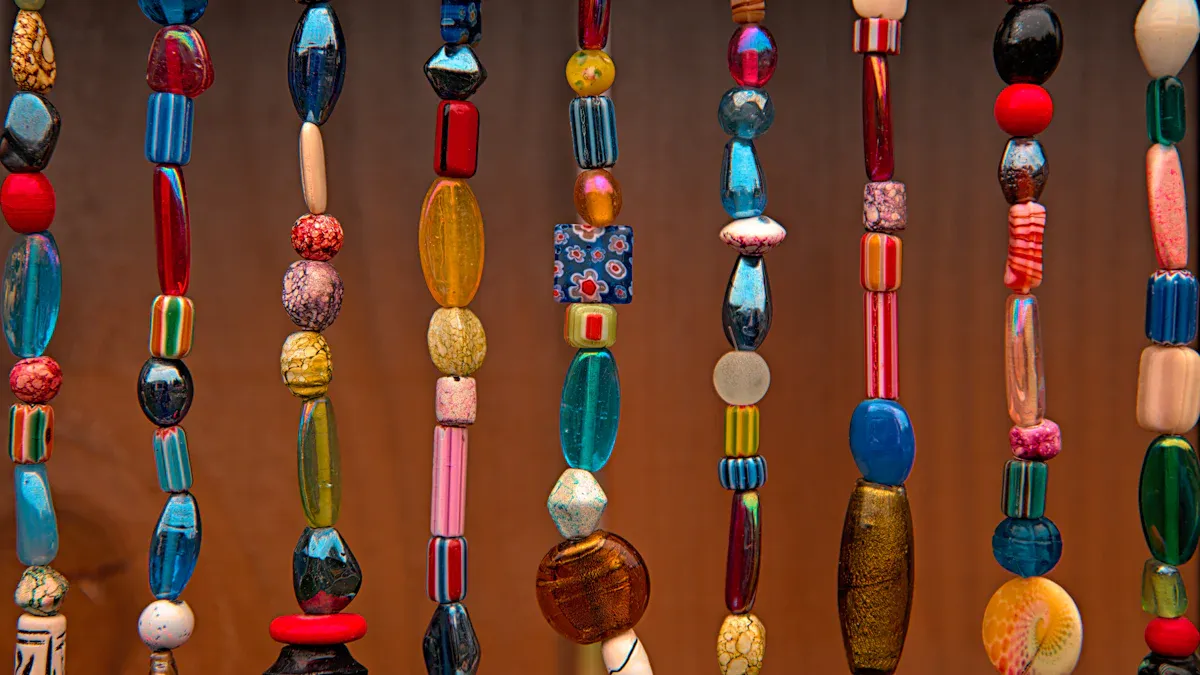
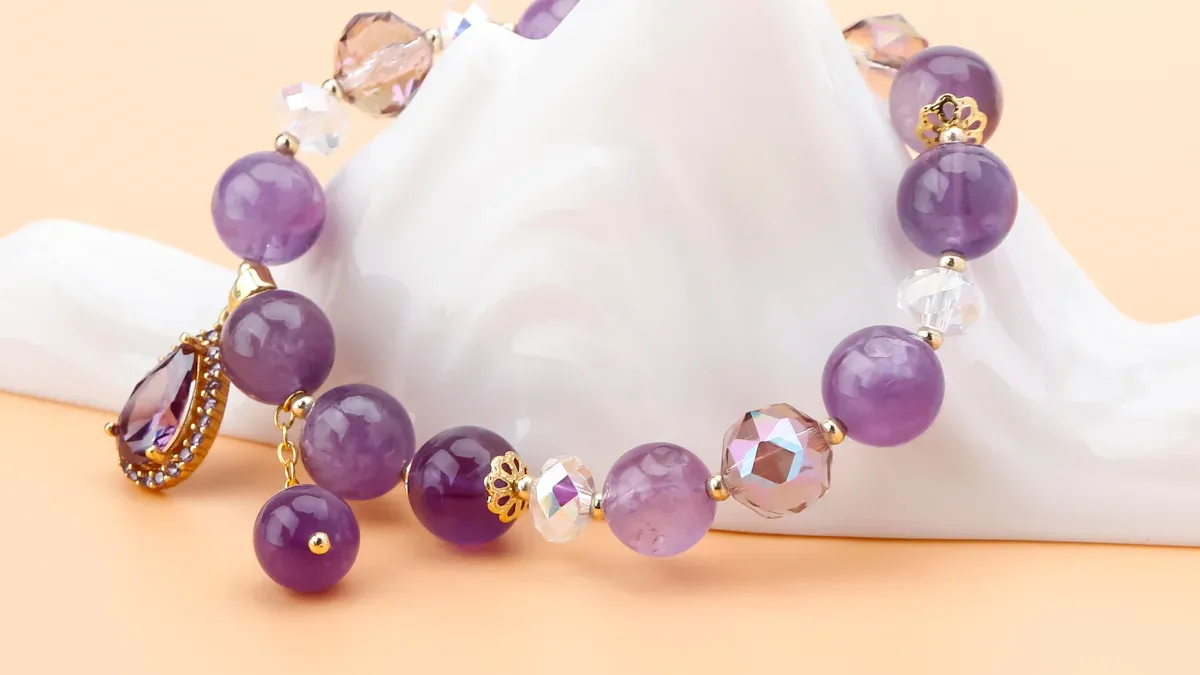
Picking the right stones is fun. Think about what colors you love. Do you want a bright green crystal or a soft blue one? Each stone has its own meaning. For example, garnet stands for friendship and trust. Turquoise means success and wisdom. Birthstones make your jewelry special and personal. Choose stones that match your style and feelings. Look at Perfect Jew’s collection for ideas. Their crystal jewelry shows how different stones can shine in silver.
You should also think about your budget. Some crystals cost more than others. Pick stones that look good and fit your price range.
Now, measure your crystals and silver pieces. Use a ruler or caliper for accuracy. Make sure the stone fits the setting you want to use. If you plan to create sterling silver jewelry, check the size of your finger, wrist, or neck. This helps your jewelry fit well and feel comfortable. Write down all your measurements. Good sizing makes your finished piece look neat and professional.
Note: Always double-check your measurements before you start cutting or shaping your silver.
You start your project by cutting and shaping the silver. Use a jeweler’s saw to cut the silver sheet or wire to the size you need. Hold the saw steady and let the blade do the work. If you want smooth edges, grab a metal file and gently round off any sharp spots. A mandrel helps you shape the silver into rings or curves. You can tap the silver with a rawhide mallet to bend it without leaving marks. Always check your measurements before you cut. This step sets the foundation for your crystal design and makes the next steps of silversmithing easier.
Tip: Mark your silver with a pencil before you cut. This helps you stay on track and avoid mistakes.
Now, let’s get your crystals ready. If you’re new to silver jewelry making, start with cabochons. These stones have a flat back and a smooth, rounded top. They are easy to set and come in many colors and shapes. Try hard stones like jasper or quartz for your first project. Avoid fragile stones that might break. You can also use snap-in settings for calibrated crystals. These settings make it simple to secure your stone. Tube bezels are another great choice. They give your jewelry a modern look and work well with small crystals. As you get better, you can try making custom bezels by cutting a backplate from silver and soldering a bezel wire around your crystal.
Note: Clean your crystals before setting them. Use a soft brush and water to remove dust or oil.
Soldering is a key part of how you create sterling silver jewelry. You use a torch to heat the silver and join pieces together. For gemstone settings, shape the bezel wire to fit your crystal, then solder it closed. Place the bezel on a silver backplate and solder it again. This holds your crystal securely and gives your jewelry a polished look. Always use a soldering board and keep water nearby for safety. Soldering takes practice, but it’s one of the most important steps in making strong, beautiful jewelry.
Remember: Take your time with each step. Careful work now means your finished piece will shine.
When you start using stones in jewelry, picking the right setting is important. If you are new, try the bezel setting first. It is simple and keeps soft stones safe. Cabochons and polished crystals work well with this method. You will also learn important stone setting skills as you practice.
Here are the steps for making a bezel setting:
Take a thin strip of bezel wire. Wrap it around your stone so it matches the shape. Cut the wire where the ends meet to make a tight fit.
Move the metal back and forth gently. Make sure the ends touch perfectly. Hold the seam together with spring tension.
Seal the seam with silver solder or another strong glue. Pick the one that works with your materials.
Use a torch if you have fine silver. If you use other metals, follow the right steps for them.
Put the bezel wire and stone into your silver base. Press down until the bent tabs are even with the surface.
Use a flat file or sandpaper to smooth the top. File the bezel’s edge to make the wall thinner. This helps you push the stone in.
Hold the bezel punch or rocker straight up and down. Push gently on the seam. Crimp the sides one after the other.
Keep crimping until the bezel strip is almost flat. Move the punch around the bezel to smooth bumps and make the stone fit tight.
These steps help your stone stay safe and your jewelry look neat. The bezel setting is best for beginners. It helps you learn how to set stones the right way.
Wire wrapping is a fancy way to set stones. It works well with odd-shaped or freeform stones. You wrap thin silver wire around the stone. You can also make loops and coils to hold it. This method lets you be creative. It is good for pendants, earrings, and bold jewelry. Wire wrapping gives your jewelry an artsy look.
Bezel setting is great, but there are other ways to set stones too. Here are some examples:
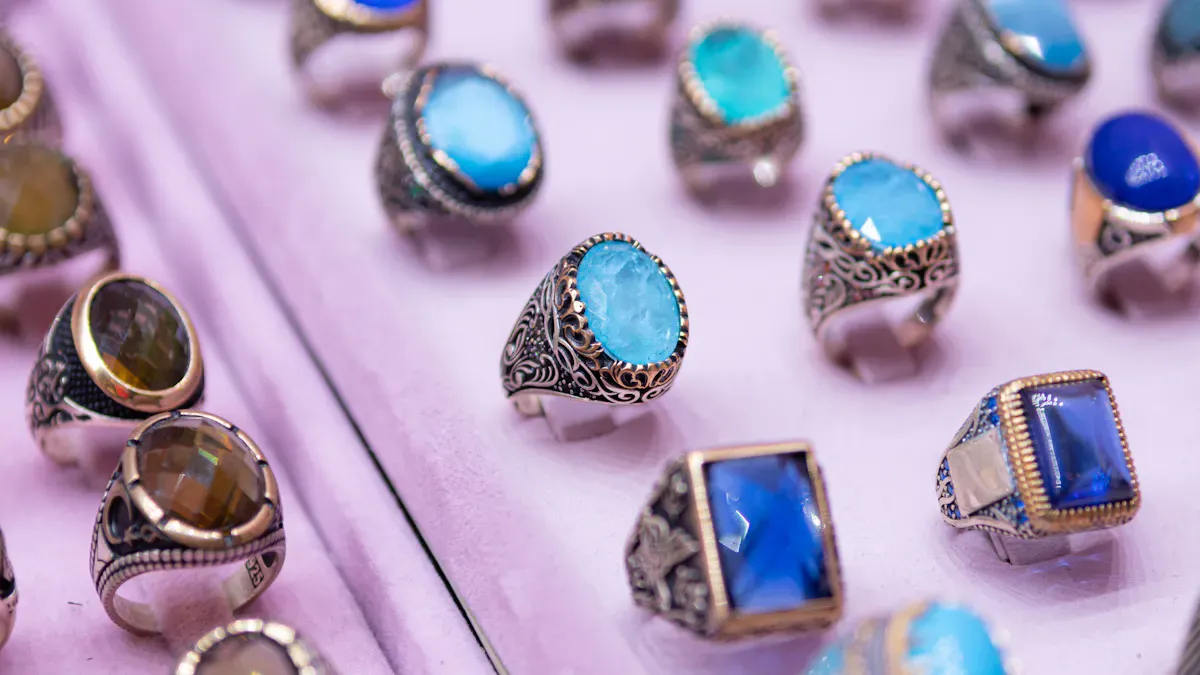
Prong Setting: Small metal claws hold the stone. This shows off the stone and makes it sparkle. It is good for gemstones like diamonds or sapphires.
Basket Setting: Works for geodes or odd stones. Prongs make a basket that shows the stone’s natural look.
Flush Setting: Puts stones right into the metal. This makes a smooth, modern style. It is best for small, flat stones.
Tube Setting: Uses a metal tube to hold the stone. It is a cool choice instead of bezels and lets you make detailed designs.
Each setting has good points. But if you are new and working with crystal jewelry or cabochons, bezel setting is the easiest and safest. It helps you learn the basics of stone setting and make strong, pretty jewelry.
Now you get to bring your crystal jewelry together. You have a few ways to connect your pieces and make sure everything stays secure:
Use strong jewelry glue for bonding stones to metal. Clean both surfaces first. Apply a tiny drop to the back of your crystal and press it into place.
Try wire wrapping if your crystal has a hole. Thread the wire through, make a loop, and twist the ends. This method works well for pendants and earrings.
Prong settings let you hold the crystal with small metal claws. This style lets light shine through and adds sparkle.
Bezel settings surround your crystal with a rim of silver. This protects softer stones and gives a classic look.
Always check that your connections feel tight. If you want your jewelry to last, take your time with these steps.
Polishing makes your jewelry shine. Use a soft polishing cloth for daily cleaning. These cloths have special agents that remove tarnish and bring back the glow. Rub gently in one direction to avoid scratches. If you polish too much, you can wear down the silver or crystal. Only polish when you see dull spots or fingerprints.
Professional polishing works fast but removes a thin layer each time. Save this for special occasions. For everyday care, gentle cleaning keeps your projects looking new. A bright finish shows off your crystal and makes your piece stand out.
Tip: Store your jewelry in a soft pouch to keep it safe from dust and scratches.
Sometimes things do not go as planned. If your bezel does not fit the crystal, place it on a steel mandrel and tap it with a mallet to stretch it. If the bezel is too big, trim and resolder the strip so the stone does not move. Make sure bezels fit snugly to avoid gaps. Use thick enough metal to prevent puckering at the corners. Always file and sand extra bulk for a neat finish.
Want to make your jewelry unique? Add initials, birthstones, or special motifs. Sketch your ideas first. You can even use CAD drawings to see your design before you start. Custom pieces tell your story and make your jewelry one-of-a-kind. Try adding a crystal from a family heirloom or choose colors that match your style. The possibilities are endless when you create sterling silver jewelry inspired by Perfect Jew’s collection.
Note: Every project teaches you something new. Enjoy the process and let your creativity shine!
You just learned the main steps for making your own crystal jewelry. Here’s a quick look:
Step | What You Do |
|---|---|
Alloying | Mix silver and copper to make strong metal |
Casting | Shape your piece with heat and molds |
Handcrafting | Cut, bend, and form silver for your crystal |
Stone Setting | Secure your crystal with bezel or other settings |
Surface Finish | Polish and add shine to your jewelry |
Start with simple crystal projects like a pendant or ring. Try wrapping or bezel settings to hold your crystal. As you practice, you’ll see your skills grow. High-quality silver makes your crystal sparkle and last. Get inspired by Perfect Jew’s collection—see how crystal shapes, stacking, and nature themes can spark new ideas.
Tip: Every crystal you use tells a story. Let your creativity shine with each piece you make!
Explore more designs and keep experimenting with crystal jewelry.
Look for a "925" stamp on your silver. This mark means your silver is 92.5% pure. You can also ask your supplier for details. Real sterling silver feels solid and does not rust.
You can use many types of gemstones. Start with hard stones like quartz or agate. These stones are easy to set and less likely to break. Avoid very soft or fragile stones until you get more practice.
The bezel setting is the easiest. You wrap a thin strip of silver around your stone and press it down. This method holds the stone tight and looks neat. It works well for cabochons and smooth crystals.
Tip: Always wear safety glasses when you cut or solder silver. Keep your tools organized in a box or tray. Work in a bright, clean space with good airflow. This keeps you safe and helps you focus.
 EN
EN
 English
  Italian
  Spanish
  Ukrainian
  Japanese
  Norwegian
  Portuguese
  Korean
  Russian
  French
  Danish
  German
  Arabic
  Back to List