You might have an idea for a special piece of jewelry. You may want to develop jewelry from your own sketches or CAD files. Perfect Jewelry works with you to make your ideas real. With good help, you can create something beautiful that showcases your unique style.
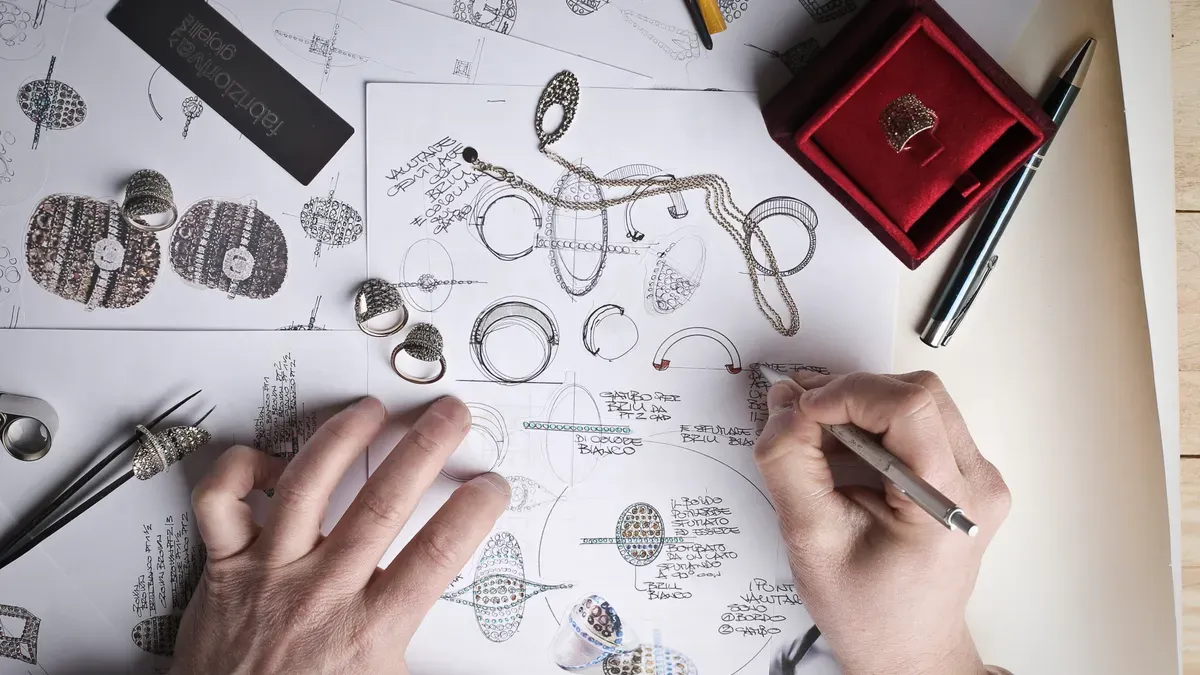
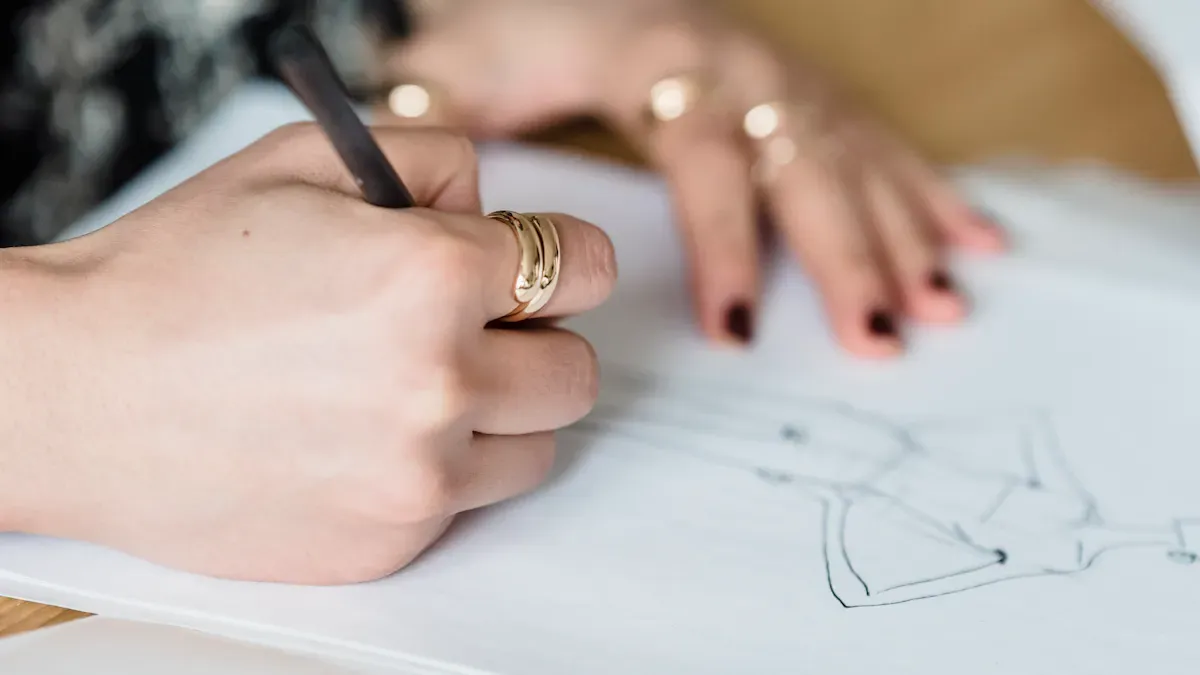
Begin your jewelry design with a clear idea in mind. Draw your concept by hand or use a computer to see your creation.
Get inspired by things like culture, music, or nature. Look at many ideas to help your creativity grow.
Pick the right tools for drawing. Digital tools like Adobe Illustrator and Photoshop help you make neat designs.
Make your design better by changing small things. Work with experts to make sure your jewelry looks right and can be made.
Use CAD software to change sketches into 3D models. This helps you see your jewelry before it is made.
Check if your design is strong and safe to wear. Look at each part to make sure it can be made well.
Make realistic images of your designs. This lets you see how your jewelry will look and make changes if needed.
Work with a team like Perfect Jewelry. Their help makes sure your ideas become real and look great.
You begin making jewelry by having a clear idea. This step is important for the whole process. You can draw your idea by hand or use a computer. Both ways help you see your idea before moving on. If you need help, Perfect Jewelry’s team can guide you. They help turn your ideas into a strong plan for your project.
You can get ideas for jewelry from many places. Designers often use their culture, music, or memories for ideas. Here are some common places to find inspiration:
Cultural designs, like batik or old buildings, show up in new jewelry.
Music can make people feel things or remember moments. Many designers use music to make jewelry that tells a story or shows a feeling.
Nature and personal memories also help create special designs.
You can look at pictures, listen to music, or go outside to get new ideas.
You need the right tools and skills to show your ideas. Sketching helps you plan and see how each part fits.
Designers use both old and new tools. The table below lists some popular digital tools and what they do:
Tool | Purpose |
|---|---|
Adobe Illustrator | Make neat digital sketches and technical drawings with sharp lines. |
Adobe Fresco | Draw by hand on a screen, great for adding small details. |
Adobe Photoshop | Change sketches, add color, and see textures using layers. |
Pick the tool that feels best for you.
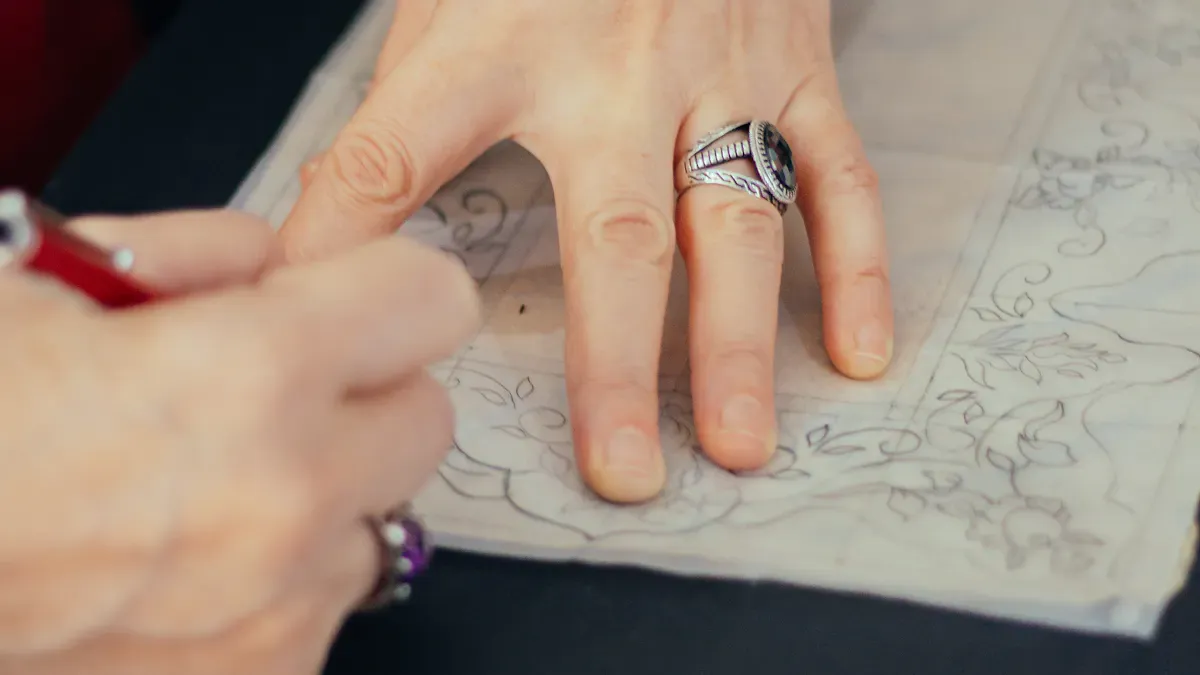
Start with easy shapes. Draw the main outline first, then add details. Use light lines so you can erase or change things. Try drawing your jewelry from different sides to see how it looks. Practice a lot to get better and feel more sure.
Tip: Keep a sketchbook or a digital folder for your ideas. You might get inspired at any time!
You should make your design better so it is special and ready to make. This step lets you change details and try new things. When you work on your idea, you can:
Make small changes that make your jewelry stand out.
Try new shapes and ideas for a new look.
Share your idea clearly with your team.
Perfect Jewelry helps you during this step. Their team listens to your ideas and makes sure your jewelry matches what you want and can be made well.
You can use CAD to make jewelry designs more exact. CAD means computer aided design. This tool helps you turn sketches into 3D models. You can see your jewelry before it is made. Perfect Jewelry uses advanced CAD and a skilled team to help you.
You need the right CAD software to start making jewelry. Each program has different features. Some are simple for beginners. Others let you make more complex designs. The table below lists popular CAD software for jewelry and what they do best:
Software | Features | Ideal For |
|---|---|---|
Blender | Open-source, complex structures, photorealistic rendering | Independent designers |
Modo | Intuitive workflow, excellent rendering | Organic and structured pieces |
Mudbox | Simple sculpting environment | Artists seeking ease of use |
Maya | Robust modeling and sculpting tools | Complex artistic pieces |
Cinema4D | User-friendly, powerful rendering engine | Visualizations and animations |
Fusion 360 | Parametric modeling, sculpting features | Engineering precision |
SolidWorks | Accuracy, strong parametric control | Mechanical-heavy pieces |
Rhino + MatrixGold | Flexibility with plugins for jewelers | Enhanced visualization and presentations |
JewelCAD | User-friendly, fast modeling speed | Beginners and experienced designers |
Some programs are best for jewelry. JewelCAD is easy and quick to use. Rhino with MatrixGold gives you more ways to see your design. Fusion 360 helps you mix creative ideas with engineering. Blender is free and very strong.
Tip: Try out different CAD programs to see which one fits you best.
You can turn your sketches into 3D models with CAD. This helps you make jewelry with more detail and accuracy. Here are the main steps:
Draw your idea on paper or on a computer.
Use CAD software to make a 3D model from your sketch.
Change the digital design to fix problems or add details.
Render the design to see how it looks in different materials.
Share the design with your team or clients to get feedback.
Use the final CAD file to make a prototype or start making the jewelry.
Perfect Jewelry’s CAD team helps you go from sketches to 3D models. You get help to make sure your jewelry matches your ideas.
You build the base model in CAD to make sure your jewelry is strong and looks good. CAD lets you control every part of the design. You can test how parts fit and make changes easily. Here is how you build a base model:
Decide which features can change and which must stay the same.
Make base sketches to get accurate 2D shapes.
Turn sketches into 3D shapes using tools like extrude, revolve, or sweep.
Add things like ribs, holes, fillets, and chamfers for style and function.
Use patterns and symmetry to repeat features quickly.
Improve the model and check if it can change easily.
Check and export the model, making sure everything fits and works.
CAD makes designs more exact than old methods. You can see every part of your jewelry and make sure it is ready to make. Perfect Jewelry uses advanced CAD to help you create jewelry that stands out.
Note: CAD gives you more control and helps you make jewelry with confidence.
You can use your skills and CAD tools to bring your jewelry ideas to life. Making jewelry with CAD is easier and more reliable.
Once you finish the base model, you start adding details. This step makes your jewelry look nice and last longer. You add special touches, check if it is strong, and get your design ready for rendering.
You can make your jewelry special by adding design elements. These details help your piece stand out and show your style. Many designers use CAD to add things like stone settings, engravings, and finishing touches. Here are some popular design elements you might use:
Stone setting adds sparkle and color.
Engraving gives personal messages or patterns.
Contrast makes different parts stand out.
Scale helps each part fit well.
Balance makes the jewelry look nice.
Visual climax draws eyes to the main part.
Final polish makes the surface smooth and shiny.
CAD lets you see these elements and how they fit together. You can try different ideas and pick the best ones for your jewelry.
Tip: Try adding small details like tiny gemstones or special textures. These can make your jewelry feel more personal.
You need to check if your jewelry is strong and safe to wear. Look at each part to see if it will last. The table below shows important steps for checking structure and manufacturability:
Step | Description |
|---|---|
1 | Pre-casting evaluation: Check thickness and balance. |
2 | Casting inspection: Look for porosity and cracks. |
3 | Jewelry testing for metal quality: Test metal composition and hardness. |
4 | Assembly and soldering checks: Check joints and connections for strength. |
5 | Surface finish and polishing inspection: Look for file marks and scratches. |
6 | Final product check and packaging: Inspect before delivery. |
You must make sure your design is easy to make. Check if the parts are thick and balanced. Look for weak spots that could break. Test the metal to see if it is strong. Check joints and connections to make sure they hold. Look at the surface for marks or scratches. Do a final check before packaging.
Note: Careful structure checks help you avoid problems later in the process.
You get your jewelry CAD files ready for rendering to show how your piece will look. Follow these steps to make your design look great:
Find inspiration. Collect pictures from Pinterest or old catalogs.
Sketch your idea. Make rough drawings to help your digital work.
Build the base model in CAD. Draw the main shape first.
Add design elements. Use symmetry tools to keep things balanced.
Check proportions. Use virtual mannequins or sizing guides.
Render your design. Use plugins to add lighting and textures.
These steps help you make realistic images of your jewelry. Rendering lets you see the final look and share it with others. This is important for making jewelry that matches your vision.
Callout: Rendering lets you see your jewelry before you make it. You can fix problems and improve your design.
You go through detailing and refinement to make jewelry that is beautiful, strong, and ready for the next step.
Rendering lets you see your jewelry before it is made. You use CAD models to make lifelike pictures. These pictures show how your jewelry will look with different materials and styles. You can test colors and shapes without making a real piece. Designers use 3D rendering to make virtual models. These models help you see the final product.
3D rendering helps you see your design clearly.
Realistic pictures show details and textures for better choices.
You can change your model fast and try new ideas.
Rendering lets you check how jewelry fits and looks on the body.
Good renders are useful for ads and marketing.
Tip: Rendering saves time and money. You can fix problems early and make your design better before making it.
Rendering also helps you spend less on photos. You do not need to take pictures of real jewelry. You make digital images instead. This way, you can change designs as much as you want. You can see which style you like best.
You need to show your renders to clients in a clear way. Designers give detailed pictures from many angles. Clients can see every part and pick what they like. Virtual models let clients try different looks. They can see changes in color, size, or setting. Animations show the jewelry in different lights or places. This helps clients imagine wearing it.
Evidence Type | Description |
|---|---|
Photorealistic Renderings | Designers show detailed pictures from many sides to help clients choose. |
Customization Options | Virtual models let clients see different looks and feel happy with their choices. |
Customizable Animations | Clients can see jewelry in different lights and places to picture it better. |
Callout: Sharing renders with clients makes things easier. Clients feel sure and happy about their choices.
You can use renders to help sell your jewelry. Good pictures attract people and show your work. You can use these images in ads, catalogs, or online. Renders help you tell your design story. You can show each step from sketch to finished piece. This makes your brand look skilled and creative.
Note: Rendering is an important part of jewelry design. It helps you see, share, and promote your work.
Making jewelry is a group project. You are important in every step. Perfect Jewelry listens to your ideas and works with you. They want your dream to become real. Talking clearly helps everyone do their best work.
You need to show your design to others for feedback. Many CAD programs do not let teams work together easily. You can use other online tools to share your work. These tools help your team see the design and talk about it.
CAD Software | Collaboration Capability |
|---|---|
RhinoGold | Does not have teamwork tools; needs other apps. |
MatrixGold | No built-in teamwork features. |
ZBrush | Does not support working together. |
3Design | Not really made for teamwork. |
You can use Miro to share ideas live. You can invite people to see your work without signing up. You can write notes right on the 3D model. These tools work with many CAD files and save changes. This helps you always see the newest version.
Tip: Show your design early. You can find and fix problems before you go further.
Getting feedback is key in custom jewelry. You can share your ideas and get help from experts. It works best when you talk with your team often. You can use pictures, questions, and digital models to explain your ideas.
Step | Description | Impact on Revisions |
|---|---|---|
1 | Stops confusion and helps everyone agree | |
2 | Use pictures and clear questions | Makes it easy to know what you like and get fast feedback |
3 | Show lifelike images | Lets clients give quick and helpful advice |
4 | Write down choices after talking | Makes sure everyone remembers the same things |
5 | Talk about common changes early | Stops mistakes and big changes later |
You can ask for changes at any time. You might want to change the size, shape, or look. Your ideas help the team make the design better. You also learn new things as you see your ideas grow.
Note: Making changes is normal. It helps you get the jewelry you want.
You say yes before the jewelry is made. You can ask for changes at many steps. Here is how it usually goes:
You look at it and give your thoughts.
The team changes the design if you ask.
A wax model is made for you to check.
You can ask for more changes before you agree.
You decide how your jewelry will look. Perfect Jewelry helps you at every step. When you say yes, the design is ready to be made.
Callout: Your ideas matter. You help make the final piece at every stage.
Working together and sharing ideas makes designing jewelry fun and easy. You work with experts who listen and help, so your ideas shine.
You now move from digital design to making your jewelry real. This stage uses advanced tools and skilled hands. Perfect Jewelry uses high-quality materials and modern technology to bring your custom jewelry design to life. You see your ideas take shape with care and precision.
You start by turning your CAD files into physical models. 3D printing helps you create detailed wax or resin patterns. These patterns show every part of your design. You can hold the model and check its size and shape. This step helps you spot any problems before making the final piece.
3D printers use your CAD files to build wax models layer by layer.
Wax models let you see the real size and details of your jewelry.
You can ask for changes if something does not look right.
The wax model becomes the base for the next steps.
Perfect Jewelry uses advanced 3D printers for accuracy. You get a clear preview of your jewelry before moving forward.
Tip: Always check your wax model closely. Small changes now can make a big difference later.
After you approve the wax model, you move to casting and assembly. This process uses high-purity metals and skilled craftsmanship. Here is how you develop jewelry from your design:
The team creates a wax model based on your approved CAD design.
They encase the wax model in a special material to form a mold.
The mold is heated, and the wax melts away, leaving a space for metal.
Molten metal is poured into the mold to form the jewelry piece.
After cooling, the mold is broken to reveal the rough metal shape.
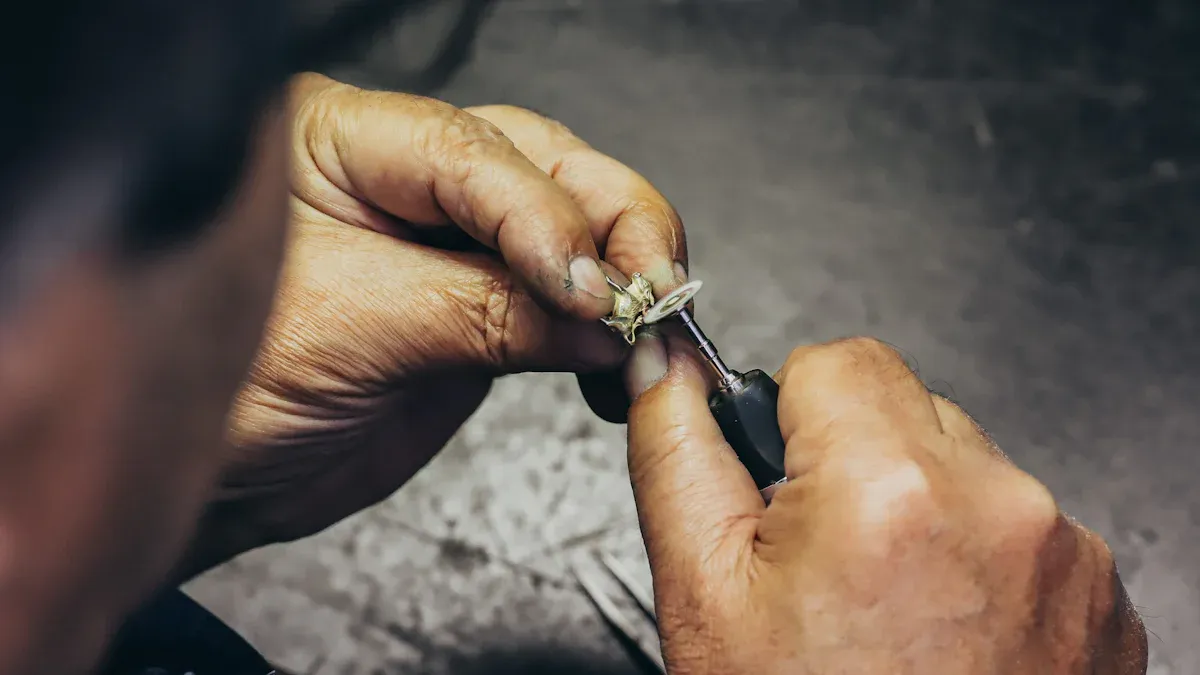
Artisans remove extra metal, polish the surface, and set gemstones.
Final touches add shine and detail to your piece.
You see your design come to life through each step. Perfect Jewelry’s skilled team uses a robust supply chain to source the best metals and stones. You get a piece that matches your vision and lasts for years.
Callout: Creating jewelry with expert casting and assembly ensures strength and beauty in every piece.
Quality control keeps your jewelry safe, strong, and beautiful. Perfect Jewelry checks every step to meet high standards. Here is how the team makes sure your piece is perfect:
Pre-casting evaluation checks your design for any issues before production.
Casting inspection looks for cracks or holes in the metal.
Jewelry testing checks the metal’s quality and strength.
Assembly and soldering checks make sure all joints and connections are solid.
Surface finish and polishing inspection finds any marks or scratches.
Final product check compares the finished piece to your original design.
You can trust that each piece passes strict tests before it leaves the workshop. Perfect Jewelry’s quality assurance process gives you peace of mind.
Note: Careful quality checks mean you receive jewelry that looks great and lasts a long time.
You play a key role in every stage, from CAD to final inspection. Perfect Jewelry’s advanced manufacturing and strong supply chain help you develop jewelry that stands out. You see your custom jewelry design become a real, lasting treasure.
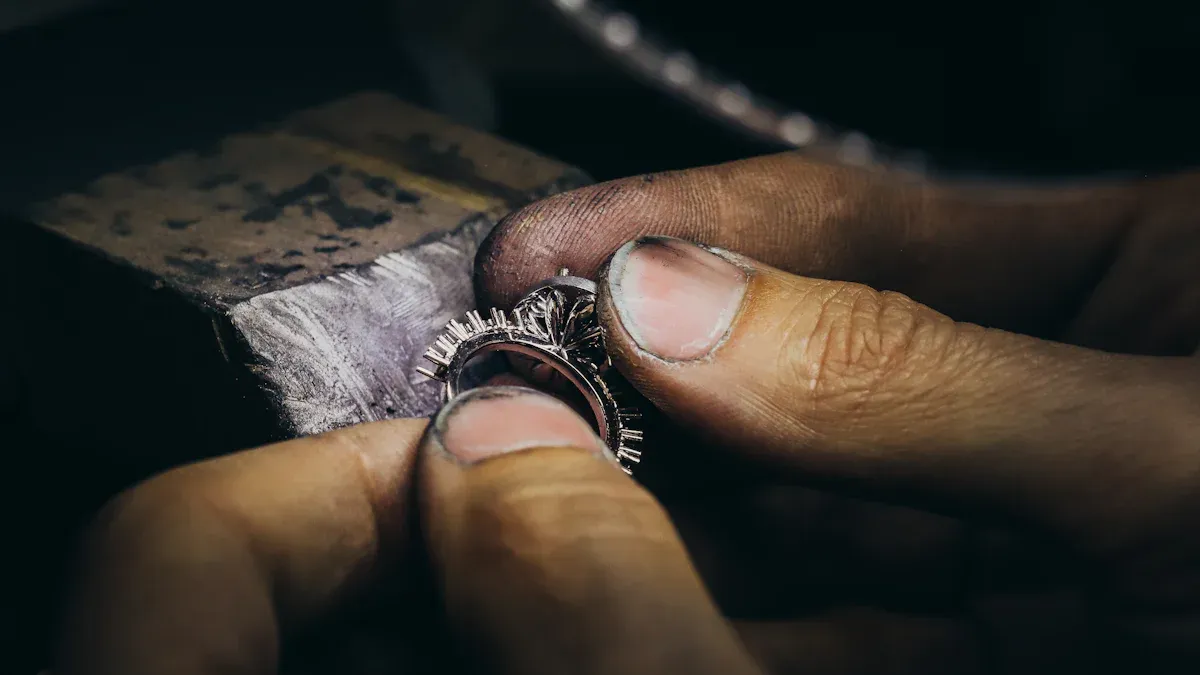
You are almost done when your jewelry is ready to shine. Stone setting and polishing make your piece look finished and beautiful. There are different ways to set stones. Each way keeps the stone safe and adds style.
Bezel setting wraps the stone with a metal edge.
Prong setting uses tiny metal arms to hold the stone tight.
Channel setting puts stones in a groove between two metal strips.
Pave setting places small stones close together with tiny beads.
Flush setting puts the stone inside the metal so it is flat.
After the stones are set, you polish the jewelry. Hand polishing lets you work carefully, which is good for fragile stones. You use files and sandpaper to make the surface smooth. Machine polishing uses special machines like tumblers. This is best for many pieces and makes them very shiny.
Tip: Careful stone setting and polishing help your jewelry sparkle and stay nice for a long time.
When your jewelry shines, you need to keep it safe. Good packaging stops scratches and damage while shipping. You put each piece in a soft pouch or strong box. Padding keeps the jewelry from moving around. You close the box tight to keep out dust and water.
Professional photos help show your jewelry at its best. Clear pictures make your jewelry stand out from the background. You can use these photos in catalogs, online shops, or on social media. Good photos help tell your brand’s story and connect with people.
Benefit | Description |
|---|---|
Photorealistic Visuals | 3D pictures show shine, texture, and skill in detail. |
Cost-Efficiency | You can test designs without making real samples, saving time and money. |
Safety | You keep valuable jewelry safe while taking clear photos. |
Note: Great photos and creative pictures help your jewelry get noticed and attract buyers.
You want your jewelry to arrive safely and quickly. Trusted shipping partners take care of your package. You can track your jewelry from the workshop to your home. Most custom jewelry takes about 4 to 6 weeks to finish. It might take longer if your design is hard or you want changes.
You get updates at every step. You know when your jewelry ships and when it will arrive. Perfect Jewelry checks every detail, from finishing to packing and shipping. You can trust your jewelry will come in perfect shape, ready to wear or give as a gift.
Callout: Good finishing, safe packaging, and careful shipping make sure you enjoy your custom jewelry as soon as it arrives.
You can create custom jewelry by following these steps:
Find inspiration and sketch your ideas.
Build a base model with CAD software.
Add design elements and check proportions.
Render your design for a clear preview.
Produce, assemble, and finish your piece.
Working with Perfect Jewelry gives you expert help and high-quality results.
Ready to start? Reach out through chat or schedule a consultation. Your unique jewelry journey begins today!
You begin by sketching your idea or using CAD software. You can share your design with Perfect Jewelry. Their team helps you refine your concept and prepare it for production.
You select from high-quality metals, gemstones, zircon, and diamonds. Perfect Jewelry sources materials from trusted suppliers.
Tip: Ask about different stones and metals to match your style.
Yes, you can request changes after reviewing the CAD model. The team updates your design until you approve it.
You control the final look.
You can ask for adjustments anytime.
Most projects take 4 to 6 weeks. Complex designs may need more time. You receive updates at each stage.
Step | Time Estimate |
|---|---|
Design | 1 week |
CAD Modeling | 1 week |
Production | 2-4 weeks |
A wax model shows your jewelry in real size and shape. You check details before production.
Note: Wax models help you spot issues early.
Perfect Jewelry uses secure packaging and trusted shipping partners. You track your package online.
Soft pouches
Strong boxes
Padding for protection
Yes, you can use your own sketch or drawing. Perfect Jewelry’s team turns your idea into a CAD model and guides you through each step.
You can create multiple pieces or a full collection. The team helps you with design, production, and quality control for every item.
 EN
EN
 English
  Italian
  Spanish
  Ukrainian
  Japanese
  Norwegian
  Portuguese
  Korean
  Russian
  French
  Danish
  German
  Arabic
  Back to List